I restored a Beaver 3800 Jointer and built a retractable caster mobile tool stand for it. I got the retractable caster idea from Carl Holmgren (see video). He is the retractable caster mobile tool stand master! I didn’t have any plans when I built it.
I made this triple monitor mount last fall. It works great. Posted to reddit and made it to the front page. 194,000 views on the imgur album so far. I’d call it a success!
[Back when I was 16, I guess I had nothing better to do than modify how my computer case looked. Here is a forum post I made.]
In the past 2 weeks or so, I’ve been messing around modding my computer case and improving the things that I just didnt like.
My case is (was?) an Aspire X-plorer ATX mid tower case. Here are pics with possible brief descriptions of what I’ve done.
First, here are some pics of my case before I did any modding to it:
Now here are quite a few shots of what it looks like now after many hours in the garage =P:
Here you can see how I stealthed the DVD drive. (among other things)This pic shows the switches (in the 3.25" bay) I put in to turn off certain fans and the cathode lights so I can actually sleep at night. Also seen here is the 120mm fan I cut in (with a wholesaw, of course...) and the new mesh i made because the old thing was just fugly, IMO.Another shot of the custom mesh cover I made, with the fans and light switches off ('Cause c'mon, I gotta show off the craftmanship here =P)
To make the mesh into the exact spot it belongs it took several steps. First i traced the outline of the old mesh with a pencil. Then i scanned the piece of paper to my computer. After a half hour of work, I finished the template. I took a peice of wax paper, taped wide masking tape to it, cut it to 8.5x11, put it in the printer, and printed off a template. I pasted it to the new mesh I needed to cut out. The black outside edge is what I needed to cut, and the red line was where i needed to meticulously bend the mesh.Onto the side panel: I cut a much larger window out as you can see. For window trim i took 14awg wire and stripped the insulation off in a clean motion, and put it on the edges. It worked out quite nicely. It is held on just by the pressure of the screws holding the window on. In the inside I put a case temp display in the top right corner. I painted the chassis white to glow nicely and contrast the black case. I added a Zalmon CPU cooler. I painted the handle (w/e it is?) of the door white to add contrast.
I cut the top window out to match the side panel (notice the side window near the handle and the top window near the fan). You can see how I also windowed my dvd drive and I also took my Aspire PSU (I know you guys hate these PSU’s – jeez they’re fine IMO…) and slightly modified it so i could make it face up, so that you can see its clear case through the top window. The 80 mm fan I cut in couldnt have fit any better since there is little room between the PSU and DVD drive to fit a fan.
Here's a better picture of the top.
[Sidestepping a bit, here is a different post I made about the DVD drive]
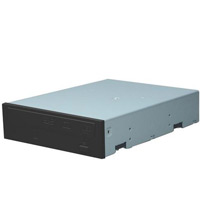
To the right is a picture of my DVD drive. This morning I woke up with ambitions. I decided to hack up my drive, wire some LEDs into it, window it, paint it, and hope it still works.
This is a blurry pic of my wiring for the LEDs, seen from the underside of the drive (without the cover on).From the top view, you can see how I arranged the LEDs.For the covers, I cut the inside cover (underneath the very outer top cover) to a allow for a lot of exposure of the disc. I cut the outer cover to a large rectangular shape.I then cut, placed, and riveted some acrylic plexiglass to to the top. I painted all the covers white (my case chassis is white)
[Now back to the original post…]
Here are a few before and after GIFs of my case.
A shot of the inside of the case.Another shot of the inside.
Some mods worth mentioning that I never explained:
removed the four lit corners on the front of the case and painted the clear plastic they were black.
painted the power and reset buttons white to match the theme
cut out the rear fan mesh and put a 120mm fan in
And finally… A shot of the entire finished product:
Suggestions, questions, and comments are extremely appreciated!
[The end. I was really proud of what I made and had a lot of fun. The computer is still being used today.]
A few weeks ago my dad’s friend asked me if I could make him a small compact stand that could house his satellite video equipment for his semi-trailer truck. It sounded like a fairly intriguing little project to me. Here is some pics from the beginning to the final product:
The material I plan to work with in my messy garage.
An angle grinder with a zip disk is one of the most satisfying tools for me. It’s so versatile when working with metal.
By clamping a scrap piece of angle iron onto the side needing protection, I am able to cut a very straight line with the cutting disk on the angle grinder.
All the pieces for the two removable trays before I begin welding.
The trays above are made to the exact dimensions of the satellite equipment. I’m not a huge fan of doing it that way, (what if something is replaced?) but the main purpose of this rack was to be as compact and sturdy as possible, and this is what I was asked to do.
I cut the middle out to reduce the weight, and as a bonus the equipment will cool better.
A big jump ahead; here is the final stand. It might be hard to tell but there is two removable racks that are fastened by thumb screws on the right side. The top mesh tray is for random stuff like remote controls, cables and whatever. The left-most compartment is for DVD’s (see last picture).
It ended up being more work than I was expecting. One thing that took longer than anticipated was the top mesh tray. I just couldn’t think of how to make it sturdy and light at the same time. I pop-riveted most of the mesh onto the steel, except around the DVD compartment where I threaded small screws in. A lot of welding rods and burnt fingers went into this very little project.