So after my silly Garage Heist dropcam video gained moderate popularity, the fine people at Nest Labs decided to send me some free stuff! Everything I will need to thwart future heists.
Left to right: Dropcam Pro, 2 “Critter Catchers”, an insect-net hat, and a card.
They also gave me free Dropcam cloud recording on my original Dropcam!
The card puts it over the top. This really put a smile on my face today.
I was cleaning up my network today and was frustrated that I couldn’t enable bridge mode on my Telus Actiontec v1000h modem/router to put it into a modem-only state. The problem is that Telus changed the root/tech passwords on firmware 31.121L.13 and nobody knows what they are. My buddy Mike told me to try editing the webpage source and I’ll be damned it actually worked!
Basic Instructions (if you don’t want to watch the how-to video below): 1. Go to 192.168.1.254 (or whatever your gateway is) and log in to the admin/telus account. 2. Go to the Advanced Settings tab and open up WAN IP Addressing. 3. Open up your web browser’s developer tools (F12) 4. Search for <tr id=”id_rfc_1483_transparent_bridging” style=”display: none;”> 5. Change “display: none;” to “display: block;” 6. Select the now visible Transparent Bridging option on the page, then Apply 7. You’re done! You can see that the bridge is enabled on the Status tab under Connection Status > ISP Protocol.
I’ve just begun working on a new project and I’ve very briefly been playing with a 4D Systems serial display (the uLCD-32PTU to be precise), ordered from Sparkfun. I figured there was no way I was gonna drop any coin on their proprietary 4D Programming cable, because from what I read it just uses a standard FTDI chip. Fortunately I had my Arduino Duemilanove kicking around, which has the USB interface with a built in FTDI controller (as do most Arduino boards) .
This one’s dead simple, so long as you have a removable ATMega chip in your Arduino.
For Arduino’s with removable chips:
Remove the ATMega chip
Connect +5V, GND, Rx, Tx, and RESET straight from the serial display to the appropriate, matching pins of the Arduino’s header. You might mix the Rx and Tx up like I did the first time around; Rx on the display goes through the line marked Tx on the included 5-pin header cable and connects to Rx on the Arduino (so, ignoring the cable, Rx to Rx). Same idea for the Tx line.
If your chip isn’t removable, it’s more complicated (and might not work):
Disable the ATMega chip by tying the RESET line to GND.
Do the same as step 2 above, but do not connect the RESET line.
The 4D Serial Display requires a momentary RESET pulse before the code can be loaded onto it (this is the DTR leg of the FTDI controller). Unfortunately, the DTR leg was tied to GND in step 1. You’ll have to manually trigger the RESET on the serial display right before it’s programmed. To do that you have to connect the display’s RESET to GND momentarily, right before the code download is initiated. It’s a matter of good timing (and would really, really suck for development purposes).
Of course, this could be applied to any board that is programmed through an FTDI controller. Hope it helps someone.
[Back when I was 16, I guess I had nothing better to do than modify how my computer case looked. Here is a forum post I made.]
In the past 2 weeks or so, I’ve been messing around modding my computer case and improving the things that I just didnt like.
My case is (was?) an Aspire X-plorer ATX mid tower case. Here are pics with possible brief descriptions of what I’ve done.
First, here are some pics of my case before I did any modding to it:
Now here are quite a few shots of what it looks like now after many hours in the garage =P:
Here you can see how I stealthed the DVD drive. (among other things)This pic shows the switches (in the 3.25" bay) I put in to turn off certain fans and the cathode lights so I can actually sleep at night. Also seen here is the 120mm fan I cut in (with a wholesaw, of course...) and the new mesh i made because the old thing was just fugly, IMO.Another shot of the custom mesh cover I made, with the fans and light switches off ('Cause c'mon, I gotta show off the craftmanship here =P)
To make the mesh into the exact spot it belongs it took several steps. First i traced the outline of the old mesh with a pencil. Then i scanned the piece of paper to my computer. After a half hour of work, I finished the template. I took a peice of wax paper, taped wide masking tape to it, cut it to 8.5x11, put it in the printer, and printed off a template. I pasted it to the new mesh I needed to cut out. The black outside edge is what I needed to cut, and the red line was where i needed to meticulously bend the mesh.Onto the side panel: I cut a much larger window out as you can see. For window trim i took 14awg wire and stripped the insulation off in a clean motion, and put it on the edges. It worked out quite nicely. It is held on just by the pressure of the screws holding the window on. In the inside I put a case temp display in the top right corner. I painted the chassis white to glow nicely and contrast the black case. I added a Zalmon CPU cooler. I painted the handle (w/e it is?) of the door white to add contrast.
I cut the top window out to match the side panel (notice the side window near the handle and the top window near the fan). You can see how I also windowed my dvd drive and I also took my Aspire PSU (I know you guys hate these PSU’s – jeez they’re fine IMO…) and slightly modified it so i could make it face up, so that you can see its clear case through the top window. The 80 mm fan I cut in couldnt have fit any better since there is little room between the PSU and DVD drive to fit a fan.
Here's a better picture of the top.
[Sidestepping a bit, here is a different post I made about the DVD drive]
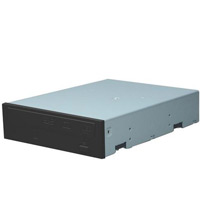
To the right is a picture of my DVD drive. This morning I woke up with ambitions. I decided to hack up my drive, wire some LEDs into it, window it, paint it, and hope it still works.
This is a blurry pic of my wiring for the LEDs, seen from the underside of the drive (without the cover on).From the top view, you can see how I arranged the LEDs.For the covers, I cut the inside cover (underneath the very outer top cover) to a allow for a lot of exposure of the disc. I cut the outer cover to a large rectangular shape.I then cut, placed, and riveted some acrylic plexiglass to to the top. I painted all the covers white (my case chassis is white)
[Now back to the original post…]
Here are a few before and after GIFs of my case.
A shot of the inside of the case.Another shot of the inside.
Some mods worth mentioning that I never explained:
removed the four lit corners on the front of the case and painted the clear plastic they were black.
painted the power and reset buttons white to match the theme
cut out the rear fan mesh and put a 120mm fan in
And finally… A shot of the entire finished product:
Suggestions, questions, and comments are extremely appreciated!
[The end. I was really proud of what I made and had a lot of fun. The computer is still being used today.]
I built my computer a little over two years ago. At the time, NVIDIA (a GPU manufacturer) and Intel (a CPU manufacturer) were at odds with their licensing agreements, and I ended up being stuck with a Crossfire-only motherboard. If I wanted to use multiple graphics cards in parallel, they had to be ATI cards. Nevertheless, I purchased an NVIDIA GTX280 card because it seemed like the best card for the price. Lo and behold, earlier this year I completely forgot my motherboard was Crossfire-only and I bought a second GTX280 in anticipation for new games such as Battlefield 3. That was basically a $200 mistake.
Fortunately, a lot of other people also wanted SLI on their Crossfire-only boards, and someone created SLIpatch. SLIpatch is great, but it has a few shortcomings such as requiring modified NVIDIA drivers for each driver revision. A few days ago the developer released a new tool called HyperSLI, which greatly simplifies the process and doesn’t require modified drivers. HyperSLI currently only works for motherboards with Intel processors, so if you have an AMD processor, you’ll have to stick with SLIpatch [Edit: Now works with AMD chipsets] . But if you do meet the requirements, here’s how to make it work:
Install the latest NVIDIA drivers for your card.
If you’re upgrading from SLIpatch to HyperSLI, just run the HyperSLI installer and click “Update”. If otherwise, just click “Install”. Simple.
When the computer is rebooting, open up the BIOS. Most computers use either F1, F2, or DEL to access the BIOS. Look for something called “Virtualization Technology” and make sure it is enabled.
When the computer boots back up, open up the NVIDIA Control Panel and enable SLI.
I’ve put this application together to switch quickly between Chrome and Firefox as I often do. Simply put, this will allow you to open an active Google Chrome tab in Mozilla Firefox (and vice versa) using the shortcut Ctrl+Shift+F. The program itself is an executable that will run in the background and can be accessed from the system tray notification area (bottom right). It’s built with AutoHotKey.
ChromeToFirefox.ahk Script (requires AHK) Download AutoHotKey website Link
Note: If you want this to run every time you turn on your computer, place ChromeToFirefox.exe in the startup folder. The startup folder (for Windows 7) is located at C:\Users\YourUsername\AppData\Roaming\Microsoft\Windows\Start Menu\Programs\Startup
If there is a bug, it’s probably because Chrome recently updated and I haven’t had a chance to fix it yet. If it doesn’t work, let me know in the comments. Another possibility for error is that it is failing to locate firefox.exe or chrome.exe. It only works if the installation directory is the default location. I’ve included the script to edit, but you will need to download AutoHotKey to compile the exe.
—
I’ve used scripts from both here and here – wouldn’t have been possible if I didn’t have them to work off of.


 I’ve put this application together to switch quickly between Chrome and Firefox as I often do. Simply put, this will allow you to open an active Google Chrome tab in Mozilla Firefox (and vice versa) using the shortcut Ctrl+Shift+F. The program itself is an executable that will run in the background and can be accessed from the system tray notification area (bottom right). It’s built with AutoHotKey.
